The following tutorial shows how to setup the development environment for Android.
You have to install the following software in your machine.
- JAVA SDK
- Eclipse
- Android Development Kit
- JAVA SDK
- Eclipse
- Android Development Kit
Steps by steps
1. Download and Install the latest version of the Java SDK.
1. Download and Install the latest version of the Java SDK.
2. Download Eclipse, either IDE for Java Developer or Java EE Developer is okay.
3. Unzip the eclipse, Open it with selecting a workspace
Now, we are going to install the Android Development Kit in Eclipse
4. Click Help -> Install New Software
4. Click "Add" and enter the following information:
Name: Android Development Kit (Actually you can enter any name you want)
Location: http://dl-ssl.google.com/android/eclipse/site.xml

Name: Android Development Kit (Actually you can enter any name you want)
Location: http://dl-ssl.google.com/android/eclipse/site.xml

5. Click "OK"

6. Select All and Click Next

7. You may get the security warning during the installation, click "OK" to proceed.

8. The installation is not yet completed... You still need to install the Android SDK.. Few steps to go..

9. After restarted the Eclipse, install the android SDK
Check "Install Android2.1" as well and click Next..

10. Wait for Eclipse to download the android SDK.
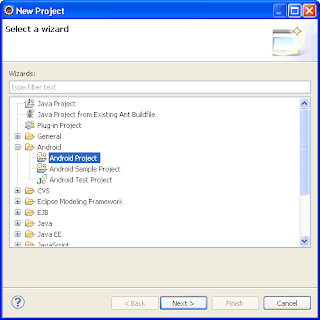
11. After the download, installation completed!! You may find the Android Project in the New Project Window.

Installed Platform
Windows XP with Service Pack 3
Reference:
http://developer.android.com/index.html
http://androidappdev.ypnet.info/kb/android-eclipse-development-platform-setup
Windows XP with Service Pack 3
Reference:
http://developer.android.com/index.html
http://androidappdev.ypnet.info/kb/android-eclipse-development-platform-setup


沒有留言:
張貼留言